These tips are for tutors to modify and tweak their modules in a quick and effective manner. Key Brightspace features like Bulk Edit and Manage Dates will be explored. As well as this, module customisation features like Progress Completion and Drag and Drop will be mentioned.
Drag and Drop Feature
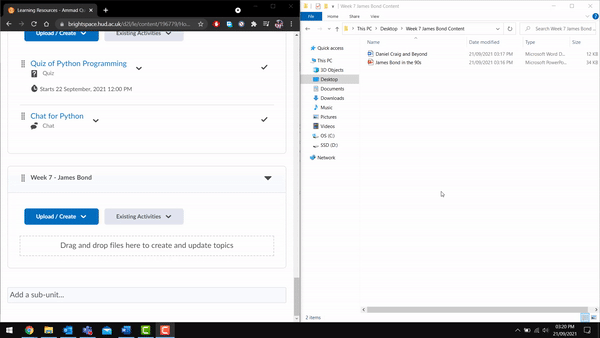
A very useful feature of Brightspace, is the widely-implemented drag and drop feature.
If you want to quickly upload multiple files from your computer to your Brightspace module. The drag and drop feature is great for this. To use this feature:
- Open the content area unit or sub-unit where you would like to drop in content
- Locate or open the folder with the files you want to add to Brightspace
- Select the files you want to drop in
- Click and drag the selected files into the Brightspace module content area
- Wait for the files to upload and the success message to appear
By default, Brightspace will use the file name as the title. It is possible to use the Bulk Edit feature to edit these efficiently (see next tab).
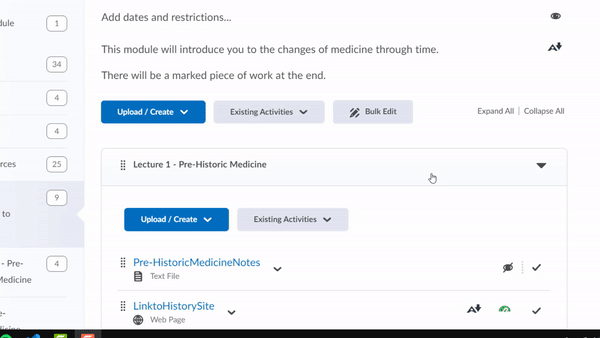
Bulk Edit
If you have multiple files you want to rename or edit, then the Bulk Edit tool will help you quickly change content without having to edit one piece of content at a time.
To do this:
- Go to the module content area where you have files you want to bulk edit
- Below the unit/sub-unit header, there are three buttons, click the Bulk Edit button
- Your content is now editable
- You should give your content meaningful names and descriptions
- Click the Done Editing button when finished
Changing Progress Completion Types
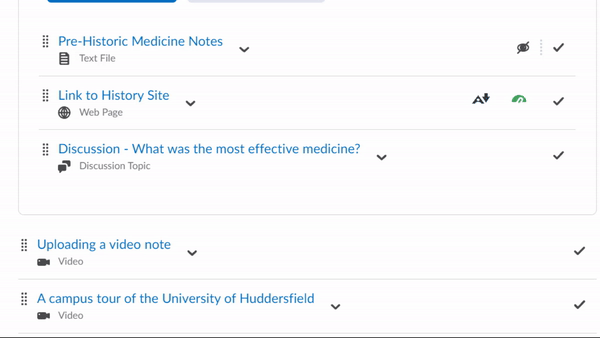
If you have content in a module that is optional to complete, or if you would like to give students more responsibility over tracking their progress, you can change the Progress Completion type for each piece of content within a module.
The options are:
- Required: Automatic – The content will be marked as either viewed or not viewed and the status will change automatically
- Required: Manual – The content with be marked as either viewed or not viewed, but the status must be changed manually by the student
- Not Required – The content will not have a viewed/not viewed status, this is usually used for optional content
By default, the content you upload is set to Required: Automatic. To change this, once you have uploaded/created your file:
- Find the topic in your content area.
- On the far right-hand side of the topic, click the tick
- Choose your desired option from the drop-down list
Managing Dates
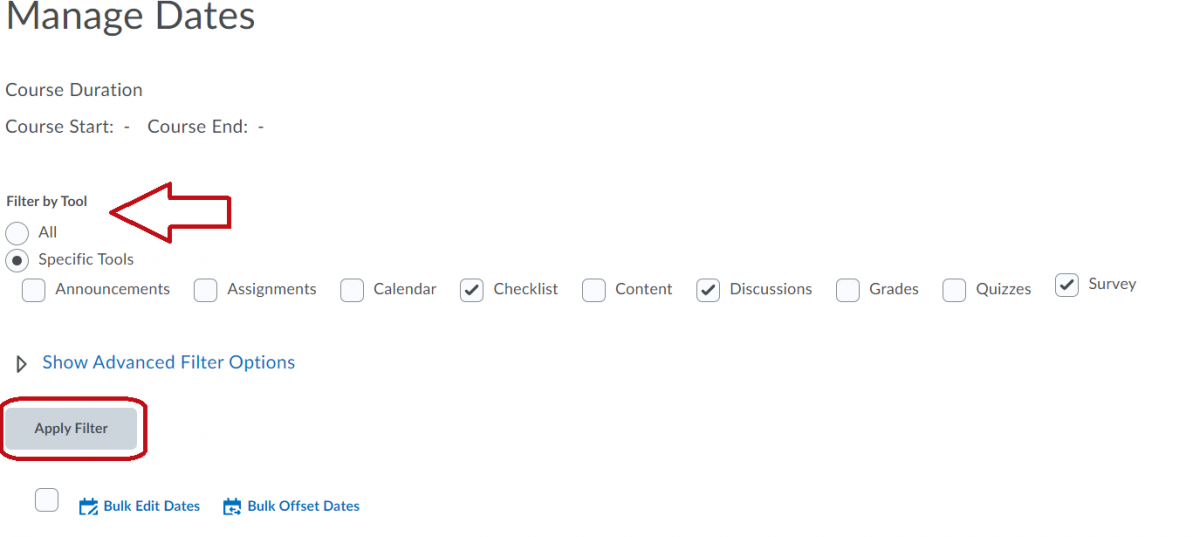
If you want an overview of your content and any dates or time restrictions applied to them, you can use the Manage Dates feature to view, change or add dates to content.
To do so, from the module you want to manage dates for:
- Click the Module Admin tab from the module navigation bar
- Under the Site Resources header, choose the Manage Dates option
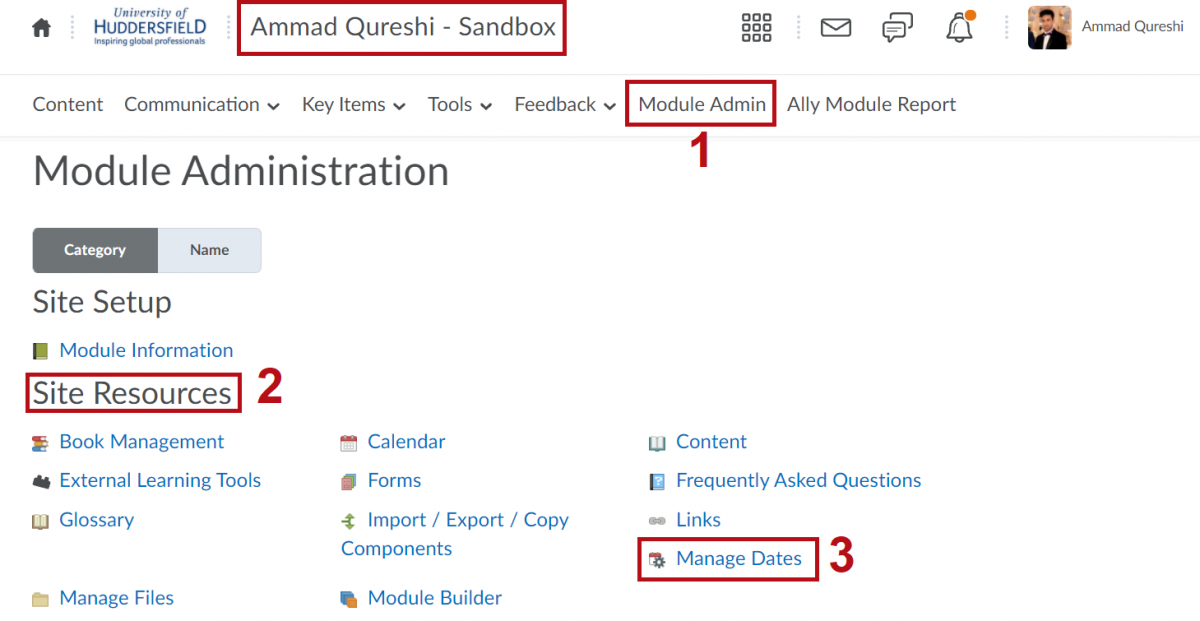
3. You can use the Filter Tool to filter by specific content type
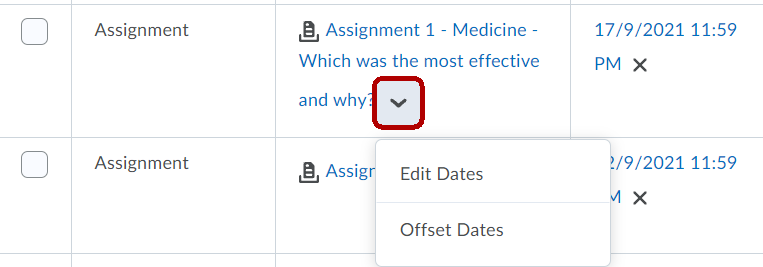
4. Click the drop-down arrow next to the name of the content to edit a single date
5. Or by checking the box next to a piece of content and clicking the Bulk Edit Dates button, you can edit the dates for multiple topics at once
